One of the other CAD/CAM vendors posted a part in the CNCZone and challenged other companies to show how easy (or difficult) it would be to machine the part with their system. I didn’t want to leave the challenge unanswered so here’s “The MeshCAM Way”.
If you’d like to try the part, you can download it here. The one change that I’m making is that he originally posted the file as a STEP file but MeshCAM takes STL. I used Rhino to convert the file but any CAD program that can save STEP can also save STL so this is really a non-issue.
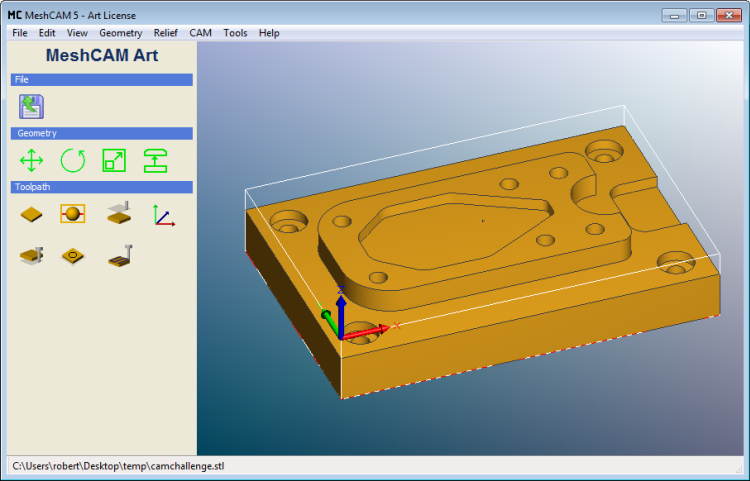
##Step 1 - Load the File When you load the file in MeshCAM you’ll see the following:

If you’re trying to see how few steps can be involved in generating a toolpath then you can see two important things in the image above.
- The stock is automatically set to the bounds of the part
- The program zero is set to the most common position
You are free to change these but most users will have no need.
##Step 2 - Generate the Toolpath
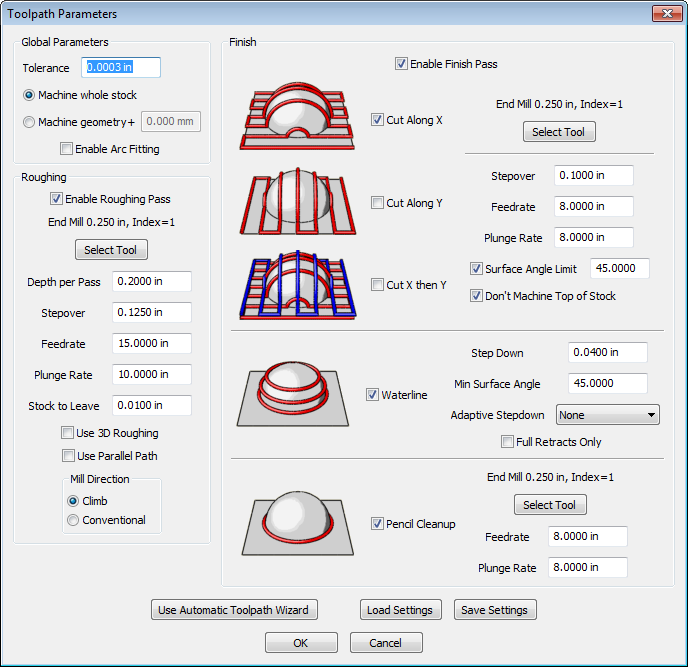
Click CAM->Generate Toolpath and enter the values below

MeshCAM shows you all of the parameters used to generate the toolpath in one window- no tabs to flip between and no hidden settings that you can’t find. If you’re trying to minimize the number of steps involved then this is a big benefit.
If you’re interested in the reason for the toolpath choices above then you can read more at Machining 2D Parts with MeshCAM
##Step 3- There is no Step 3

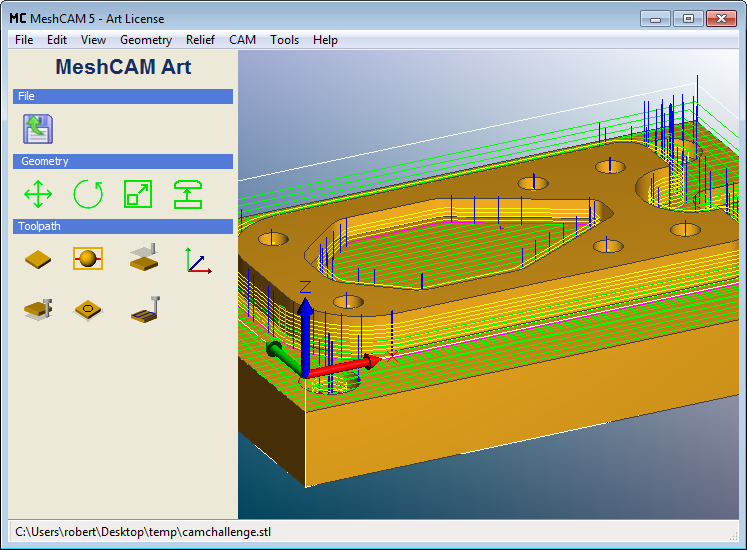
That’s it- just save the toolpath and you’re done.
Note: The holes are profile machined. If you want to drill them then you’d need to use the MDI interface on your mill until the drilling operations make it into MeshCAM.
##Why use 3D CAM Software for this Part? 2D CAM systems are valuable tools to have available but they have a different workflow than what I showed here. 2D CAM packages will generally require you to define each machine operation by picking vectors and telling the CAM software exactly how to machine it.
Because MeshCAM is 3D CAM, it is able to automatically extract all of the pocket and profile boundaries and the depths to cut without you having to specify anything.
##Is MeshCAM the Best Choice for this Part? The answer to that question depends completely on your intended use. The tradeoff for the shortened workflow above is that you will not have complete control over every entry and exit from the part or the exact order of the machining. If this matters to you, or if you need the absolute shortest toolpath possible because you need to make a lot of these, then you may be better off with a really high-end system that gives you complete control of every aspect of the toolpath. (Check out our MeshCAM vs Mastercam post for more of our thoughts on this)
If you are in a prototype or low-volume machining environment then it may make sense to trade some control to save you time programming the part. If this is the case then MeshCAM may be a perfect fit for you.